

I have a friend who plays D&D and I wanted to make him something for his birthday. At the same time I wanted to try out using scales in a crochet project, so it worked out pretty well!
My Etsy Shop where I sell these bags. I make them made to order so you get to design it!
Updates:
More pictures! (because there aren’t enough already).
Added a more in-depth tutorial on how to make a tassel and with better materials.
Added how to add charms/spikes.
Added how to add eyelets for pull cords.
Changed the way I sew in the lining.
Added a better materials list and links to where to get those materials.
Materials:
3MM crochet hook. The hook I use is this one on Amazon.
tapestry needle
regular needle
Thread (color of choice)
Drawstring “cord stop” or “cord lock”. Depending on which sites you look for them at they call them different things (really weird) Several different choices here. The ones I use now are from Hobby Lobby but you can find them on Amazon and Etsy also.
1/2 yard of cloth
Straight pins (to hold the cloth in place)
Super glue
Stitch marker
Small Aluminum scales. I am ordering mine from TheRingLord.com. You can go with Amazon but you will end up paying a crapton more. This bag took 181, but you might want to get more just to be safe (I ordered 200)
Super glue (not pictured above)
Something to mark your cloth (not pictured above) I use a piece of chalk or a white crayon depending on the color of the cloth.
Yarn Bee, Soft Secret in Honey (or any color really. I like this brand because it’s shiny and soft enough to where it has a little ‘flop’. Will run you about 5$ at Hobby Lobby. Caron Simply Soft is another good option and is a bit cheaper.

For Tassel:
Thread of choice
Small rubber band. I try to match the color to the tassel or thread color.
Crochet thread. I use Red Heart. You can also use embroidery thread. If you do you only need 4 of them.

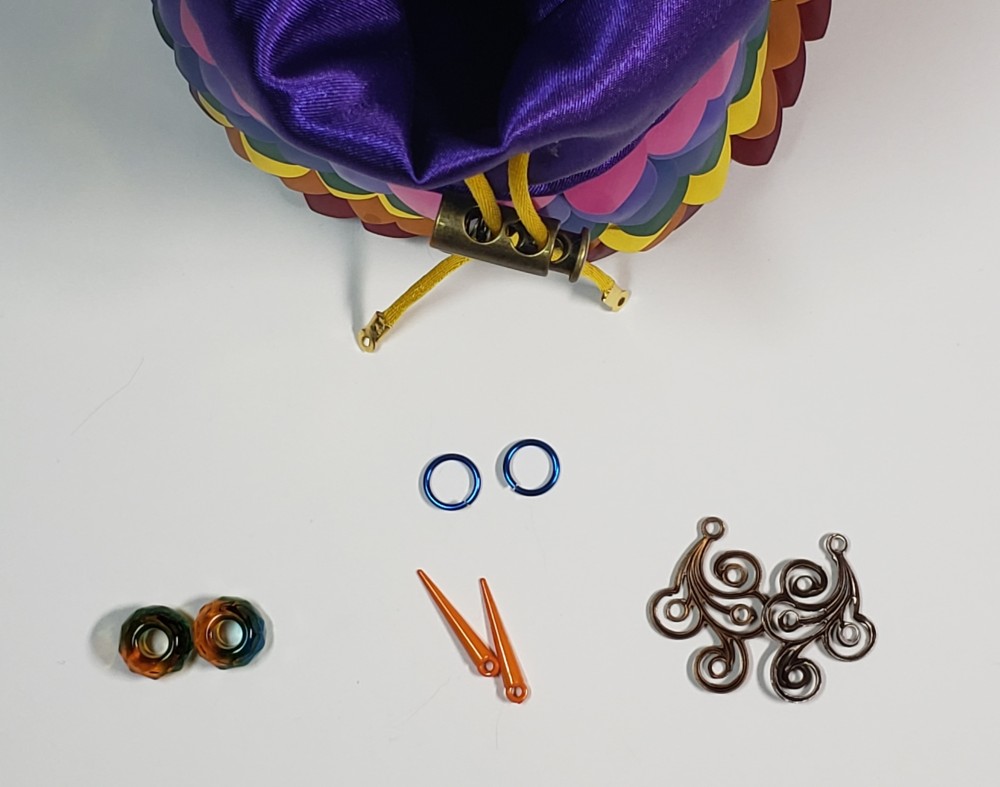
For Spikes/gems/charms:
I get my spikes from two different places: Theringlord.com and SmileBoy on Etsy.
Most of my gems and charms I get from Etsy! Most of the sellers I have bought from have been able to “customize” my orders to help me get exactly what I want to make my bags look awesome!
Rings: I get mine from TheRingLord.com. (Anodized aluminum 18g 9/32”) Depending on what you want to have at the end of your cord you might need a bigger or smaller ring. Please keep in mind the size of the hole on your cord crimp.
Cord Crimps: I get mine from Amazon.
Pliers: You will need two of them. I got mine at a local hardware store but you can get them almost anywhere.
Making The Bag:

Start by making two circles.
Pattern is:
6 single crochet in a magic circle – 6 stitches
increase in all 6 stitches around – 12 stitches
increase, 1 SC X 6 – 18 stitches
increase, 2 SC X 6 – 24 stitches
increase, 3 SC X 6 – 30 stitches
increase, 4 SC X 6 – 36 stitches
increase, 5 SC X 6 – 42 stitches
increase, 6 SC X 6 – 48 stitches
increase, 7 SC X 6 – 54 stitches

Next you will put them together. This makes the bottom a little more sturdy.

You need to single crochet them together working your way around.

Make sure you are going though both with each stitch.

Any ends you have hanging all over:
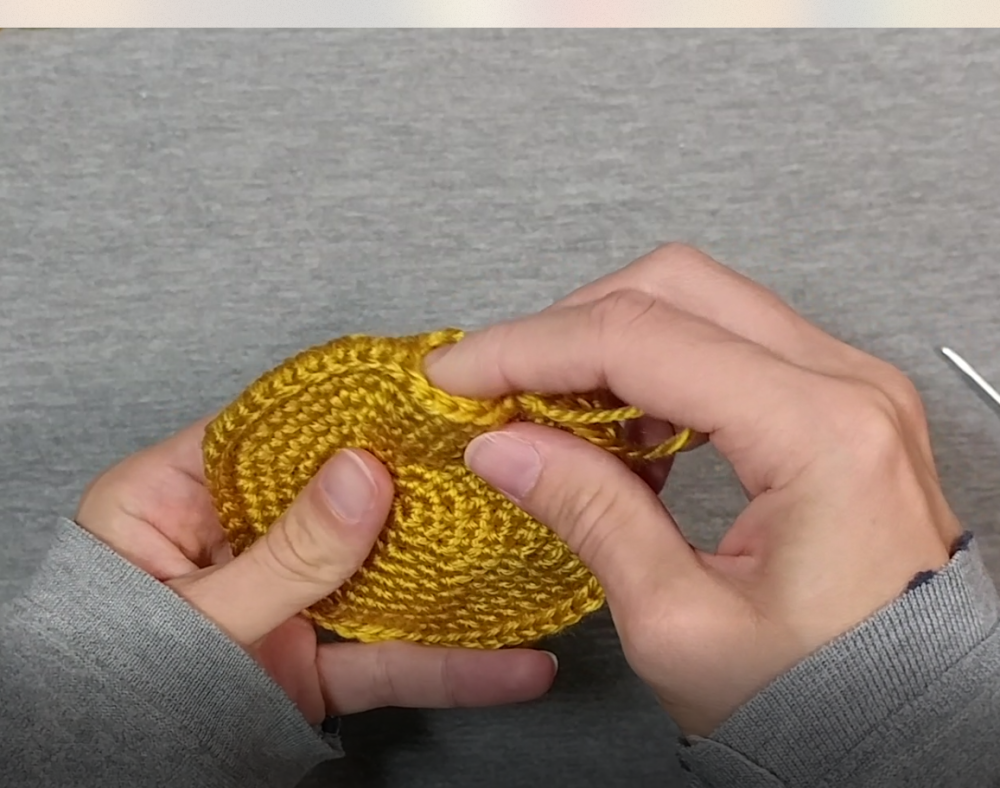
Just stuff inside before closing

Done! Don’t cut your yarn off.

Next you will do a round in the back loops only. This one round is the only round to be done this way.

This is three rounds after the back loops only round.

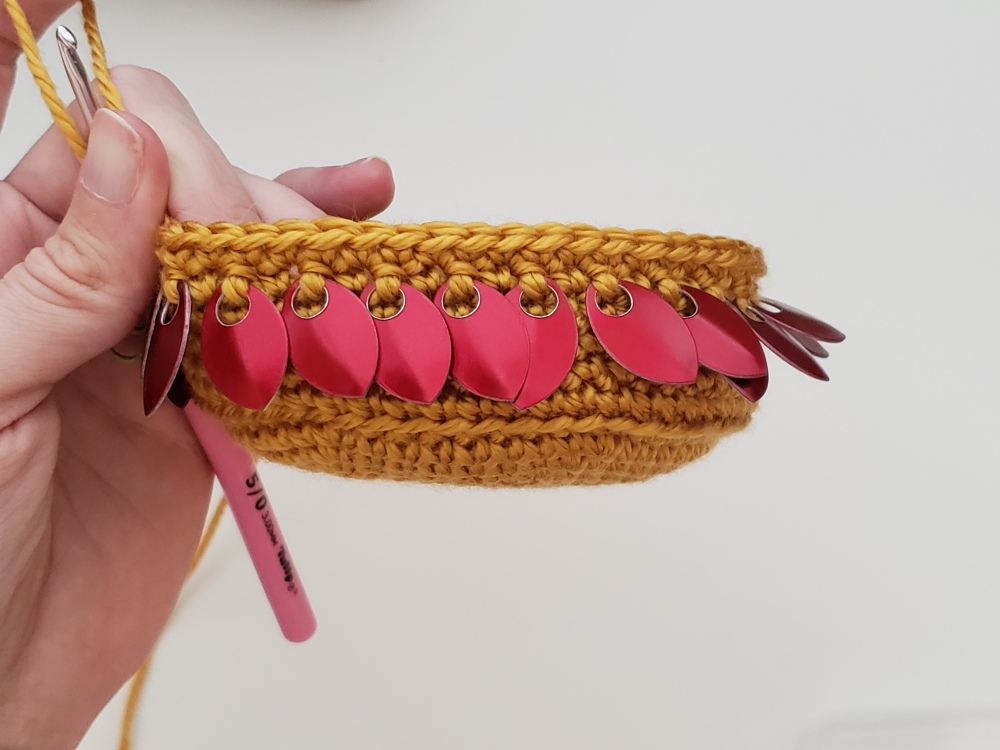
You don’t want to start your scale round right away otherwise when you sit your bag down they will fan out strangely (unless that’s what you want) So the first scale round that you do should be at the height of the scale from the bottom. (like pictured above)

Work one regular crochet into your ‘scale round’. Next you need to go into the next stitch from behind.

Add your scale on your hook. Make sure it’s curving the right way.

Hold your scale steady, they like to slide freaking everywhere.


Yarn over and pull through your scale


yarn over and make a regular single crochet.

your next stitch is just a regular single crochet from the front. You will work the scales in a “Scale, no scale, scale, no scale” pattern until your ‘scale round’ is done

single crochet after the scale
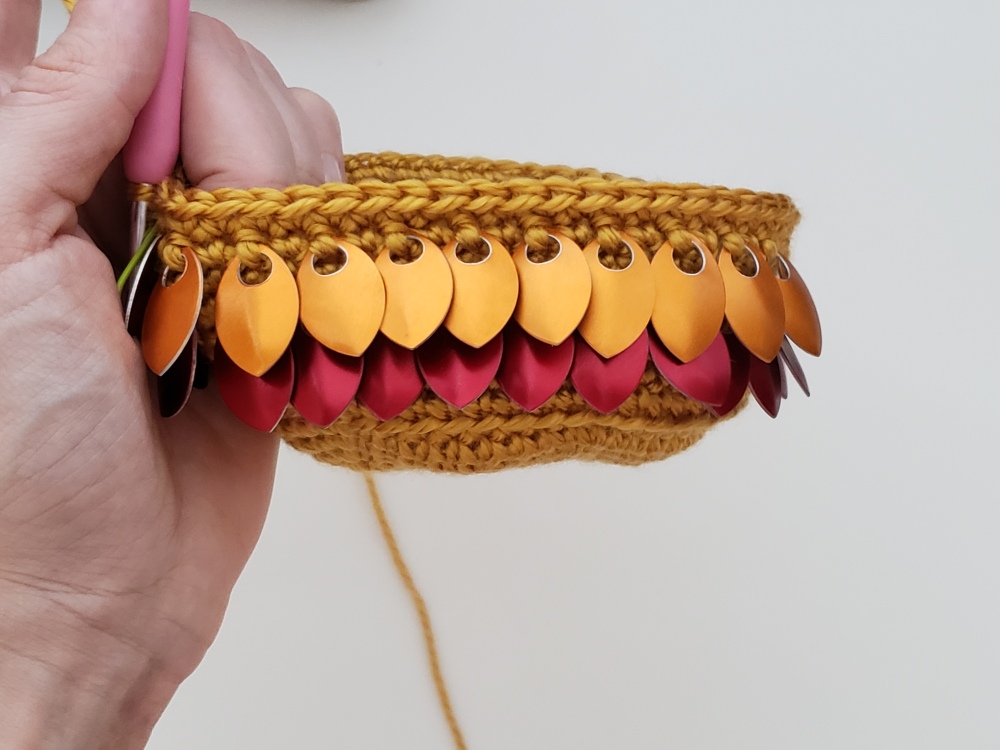
After completing your ‘scale round’ you will make a regular single crochet round. This is what your first two rounds should look like. (above)
Here are what your rounds should be:
(Going to start our count at 1 for the first scale round so our first 3 from the bottom do not count)
Round 1: Scales
Round 2: no scales
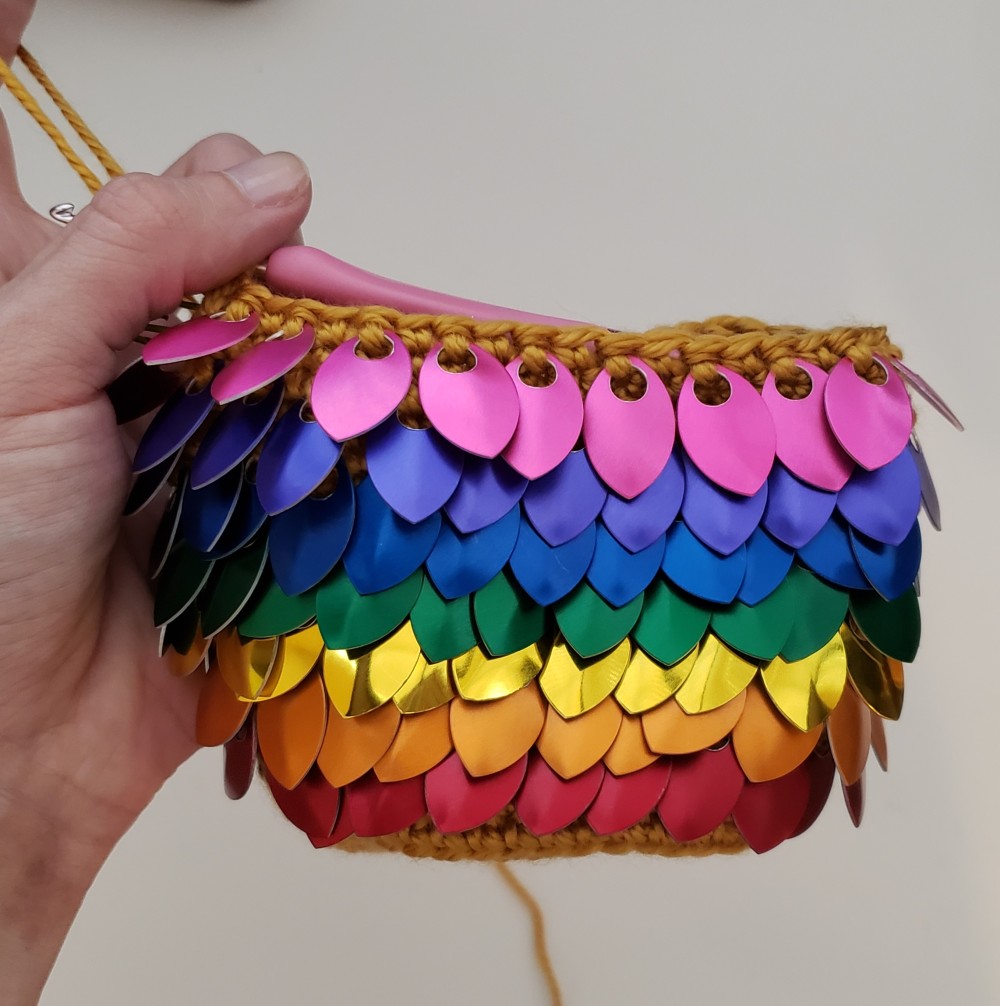
Round 3: scales
Round 4: no scales
Round 5: scales
Round 6: no scales
Round 7: scales
Round 8: no scales
Round 9: scales
Round 10: No scales – This round you will make a decrease stitch in every 8th stitch all the way around
Round 11: scales
Round 12: no scales – This round you will make a decrease stitch in every 7th stitch all the way around.
Round 13: Scales. This is your last scale round.

Make 3 more SC rounds.
Lining:

First, measure the circumference of your bag. It should be about 14” around. I suck at sewing so I give myself a ½” more just in case.

You need to measure the length of the bag now. I start with 3” at the last scale round. The 3” that stick up will end up being the “lip” of the bag. I usually end up with 6” so I cut 6 ½”.
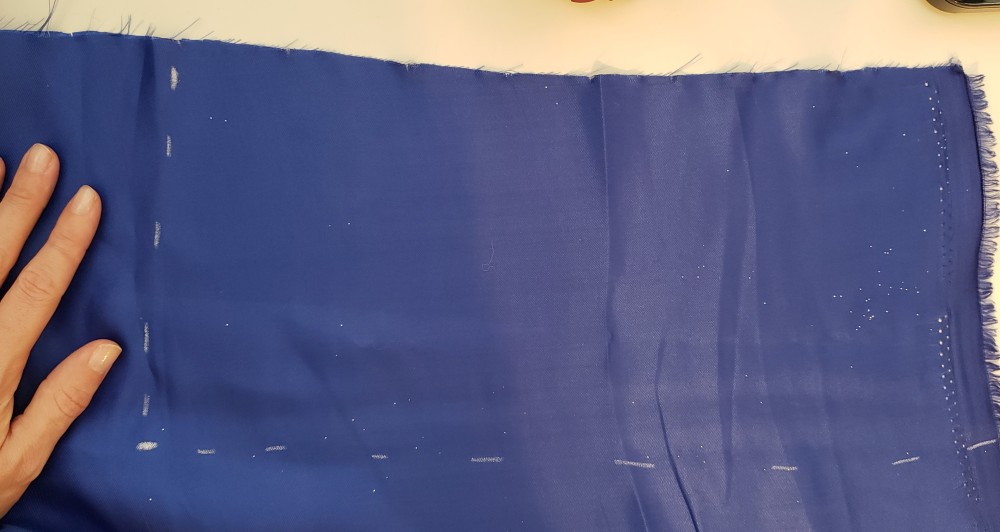
Marked cloth with crayon 14 ½” long and 6 ½” wide.

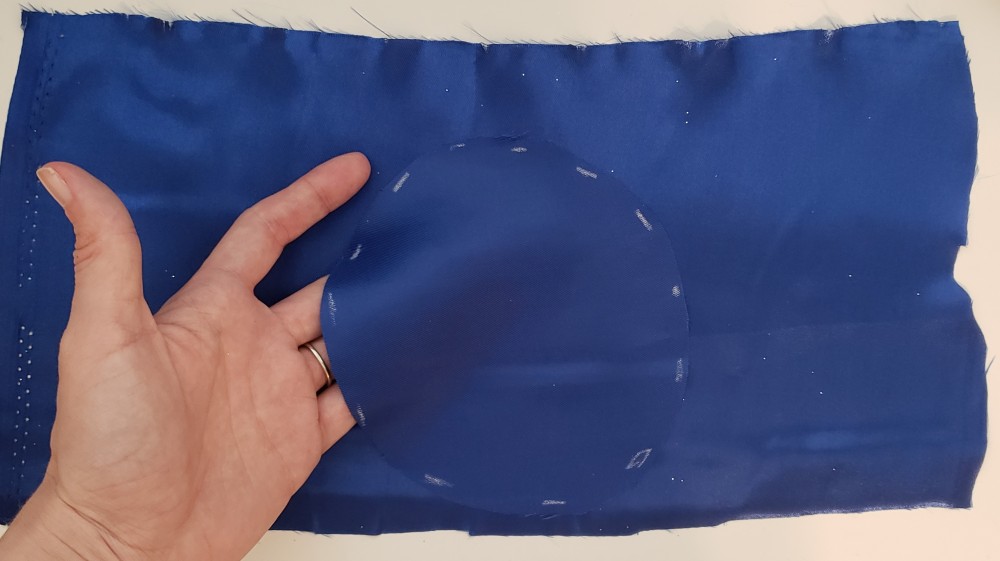
Next, put your bag on your cloth and trace the bottom, once again giving yourself about ½” more wiggle room.

Like so.
After you cut your cloth out you are going to want to lay them “good” side to “good” side. (good side is whichever side is most pretty.

Pin around. You’re going to have to put some pleats in the circle so it will fit properly.

Pinned with two pleats.

Then pin the edges together until you have a tube, then sew together. You will also need to add a hem at the top as well.


Everything sewn together with hem at the top.


Insert and fold over the excess.

Line your hem up with the circles in the scales.
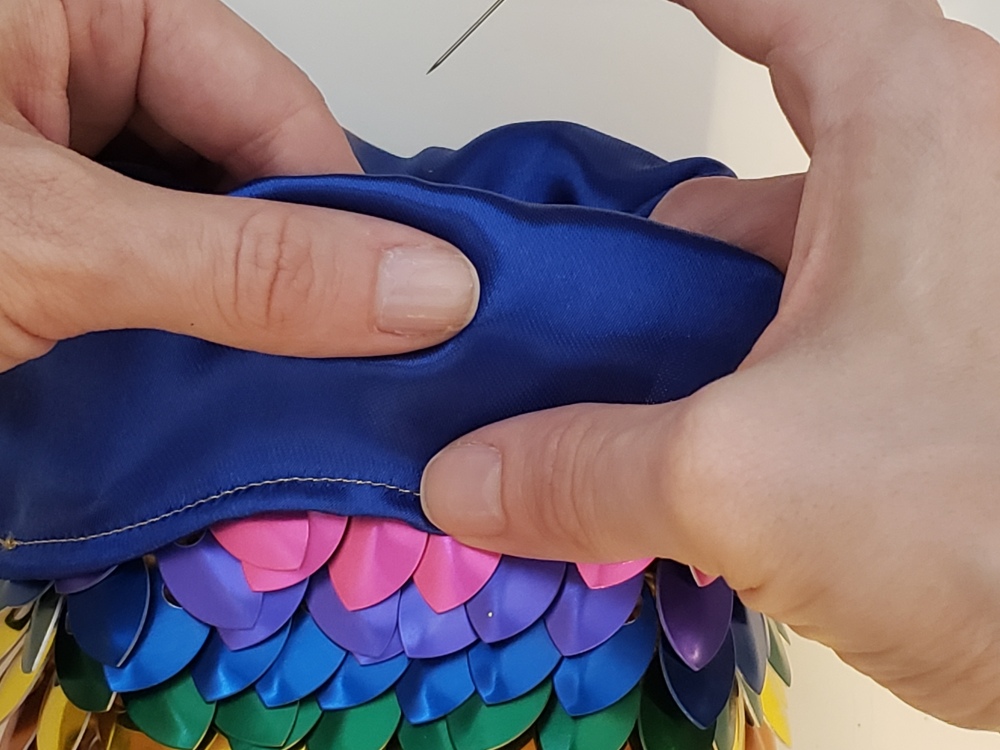
Above you can see my thumb pinching the top of the cloth. I try and keep about a thumbs width of cloth above the crochet rounds underneath. This is the cloth that tightens closed. If you have too little your bag won’t close properly and you will have a gap.

Everything pinned down. Make sure you didn’t bunch up the inside too bad.
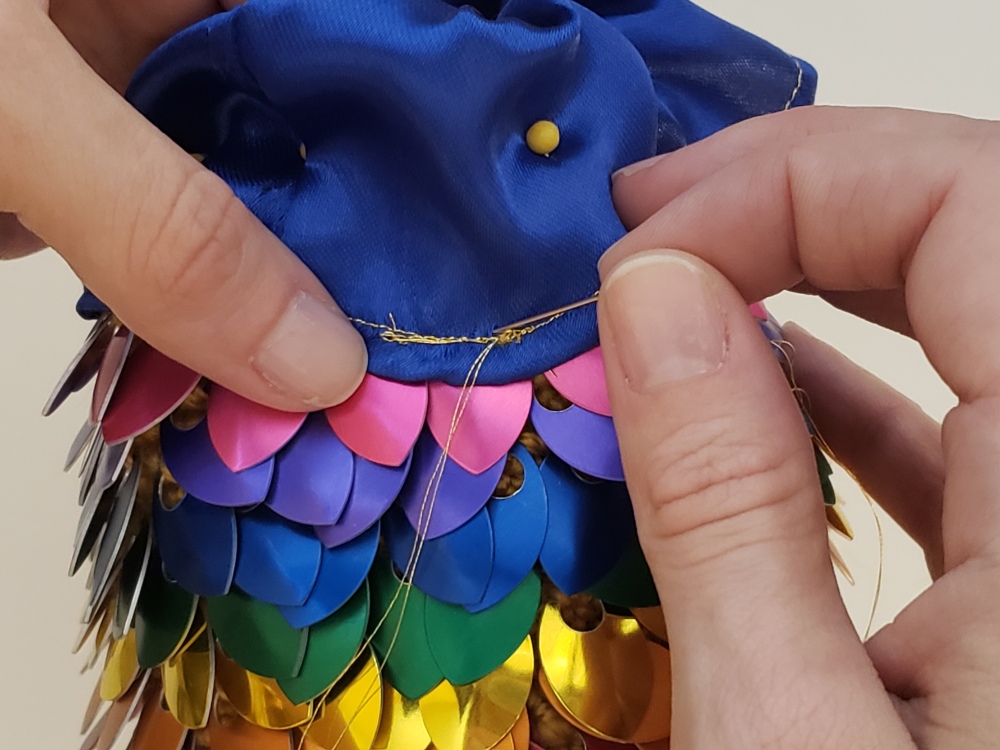
Sew everything down. Try and keep all your stitches on top of your hem stitches to keep everything looking clean. You will make one stitch inside the circle in the scale, and then one stitch in-between each scale all the way around. Unless you are adding an eyelet (see below)
Adding Eyelets:

If you are adding eyelet(s) you need to stop about 2” before you finish stitching around.
***If you have never used an eyelet before please practice several before adding one to your bag!!***

Cut a small spot in your cloth (depending on the size of your eyelet) I’m only using one so I’m only cutting one spot.

The “smaller” side goes into the pretty side of the cloth. (inside view)

I personally like to add a few dots of glue in-between the front and back, so this is optional. Doing this also helps to hold it in place while you hammer it down.

Press the back down.


Hammer in place and finished (inside view)

Finished with everything sewn in place!


Thread your embroidery needle with your cord and run it through the top of your bag. Cut it to the length you want.
 Add your cord lock.
No Eyelets:

Poke two holes side-by-side into your cloth.

Poke one more in the inside “back” of the bag. You will do this to help you pull the cord all the way through without it getting too bunched up.


Thread your embroidery needle with your cord and push through one of the holes you made in the front.
Feed it through until you reach the front again, then push it through the second hole in the cloth.
Cut your cord to the length you want.

Add your cord lock.
Tassel:

Tie the end of your cord together.


Hold your thread like so with your fingers spread out and the end pinched between your pinky and thumb.
Wrap the thread around 100 times. You can do more if you want. Cut the end of the thread.


Cut through all of them on the pinky end.


Put the thread in the loop you made with the cord. Fold both sides together and tighten your band around your tassel.

Cut off the excess.


Take your thread and tie it over your rubber band. Wrap it around until your band is completely covered. Tie it off and leave about 2″ of thread so you can hide it.


Take your tapestry needle and push it down into the middle of the tassel. Then thread the needle with the leftover ends.
Pull it through to hide them. Cut to length.
For Spikes/gems/charms:


And add a little dot of glue. This is optional, but the gems and spikes get pulled on a lot so it’s better to be safe than sorry!


Try and keep your cord flush with where the little “wings” so you don’t have excess sticking out all over the place and crimp it tightly.
Pick your poison! The sky is the limit on what you can add to the ends. I personally like to do spikes, but you can do beads, charms or even a tassel on each end!


Open your ring and add your stuff.
Close your ring and make sure that there is no space for your rind to slip off your cord crimp.


I decided to go with purple and orange spikes!
All done! I hope it serves you well in all your adventures!
Thanks to all the people on Reddit r/DungeonsAndDragons who liked the bag!
Also thank you to all the people who have ordered bags from me. This pattern wouldn’t have evolved the way it had if not for you!
This is a free pattern! Please do not take and try to sell any part of it. If you use this pattern please give me some credit for it!
© 2019 Jessie Alameda

So beautiful. The page for the scales has so many options. Can you clarify which one you bought? Size make and color? Thank you!
LikeLike
I use the small scales, and for the golden bag I actually used the “bronze” color.
LikeLike
Thank you for the superfast reply! I’m browsing through your site. Wow you made a lot of those bags! How did you get the horns in–those look so cool.
LikeLike
Is there perhaps a pattern I could buy where you explain where to get those horns and how to attach them?
LikeLike
Hi again, still would be more than happy to pay for a pattern that describes the spikes, what kind they are and how you added them. I really want to make this for my hubby with the spikes. Would be so cool.
LikeLike
Sorry, it took me so long to get an updated version of this pattern up! We just moved and it took a lot longer than I thought it would.
LikeLike
Thank you so much for the update! It does help a great deal, but I was actually referring to the spikes you put at the top of the bag (the slightly bent ones), not the ones on the ends (though that’s really pretty 🙂 )
LikeLike
The ones on the top are done similarly to how you insert the eyelet. Make a small hole and insert the screw part of the spike. Add just a dab of glue and screw on the spike.
I get these spikes from Amazon, just look up “spike studs”.
LikeLiked by 1 person
Thanks so much for your help! I’m hoping to make him this for our anniversary this April. We met in an MMORPG, so it’ll be perfect 😀
LikeLike